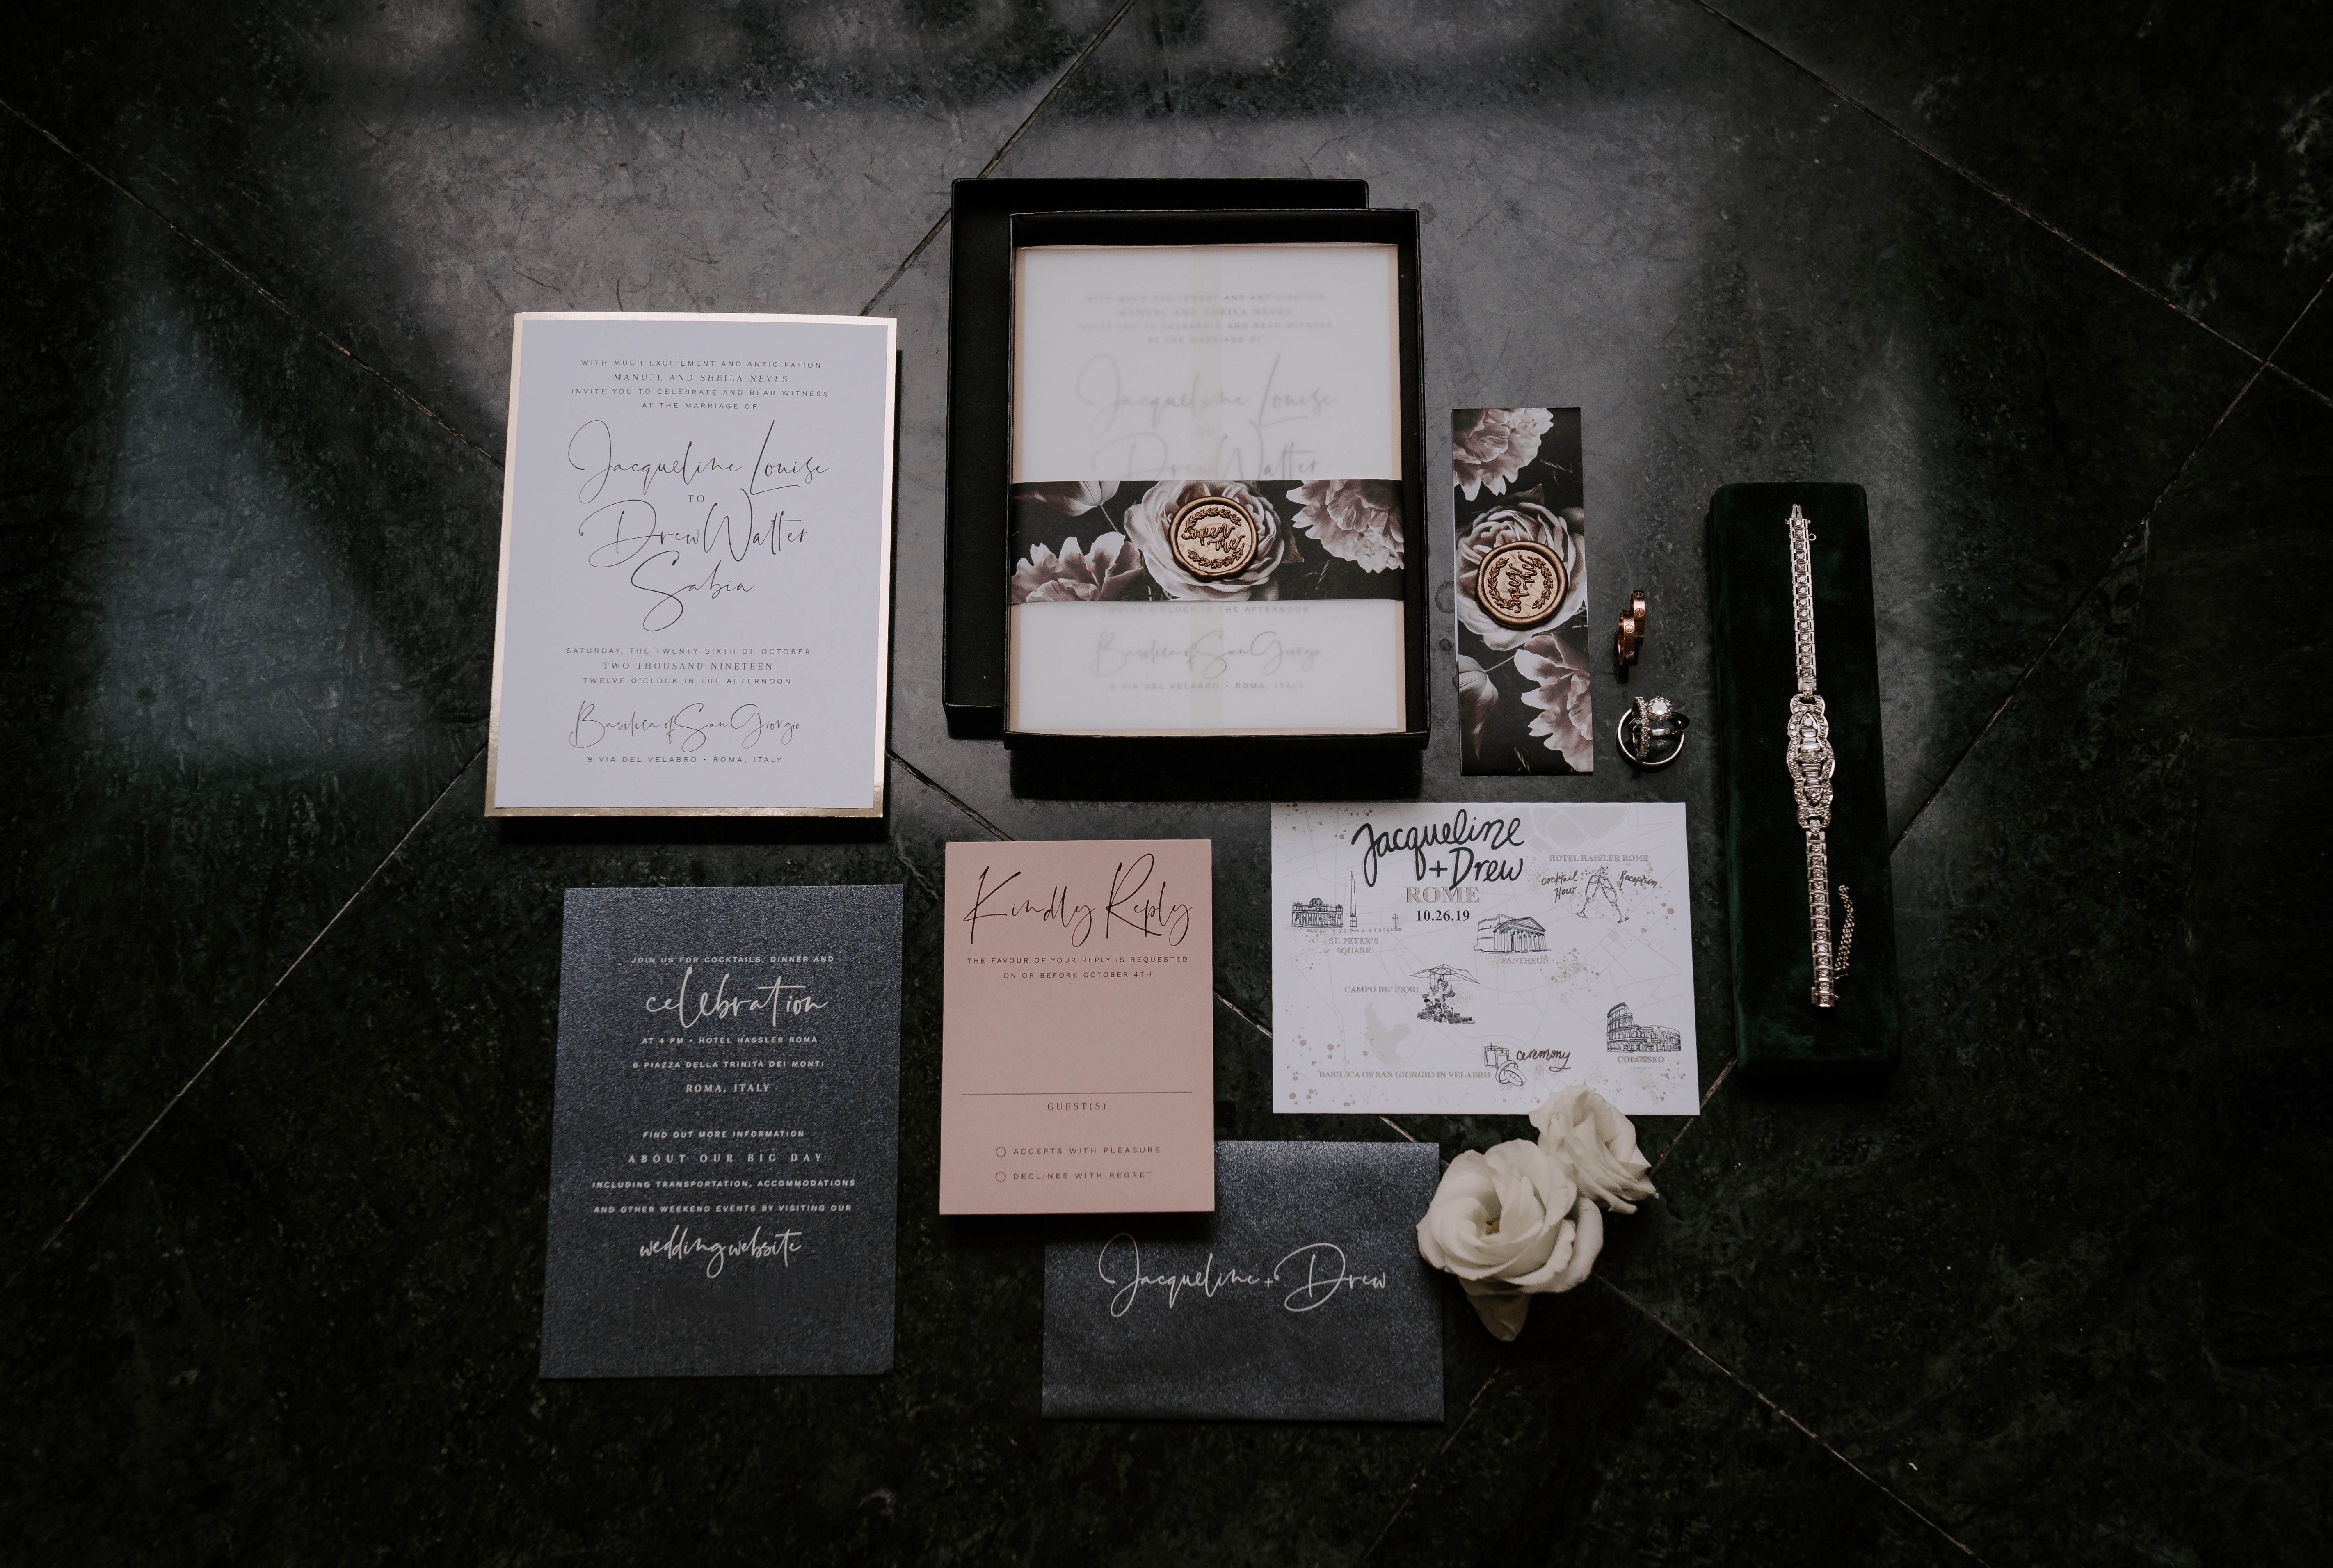
We wanted every aspect of our wedding to be unique. And what sets the tone for the wedding day? The invites! When our wedding planner, Cristen, introduced us to Val the Paper Perfectionist we knew it was a match made in heaven. Immediately we could see her passion for stationery and paper goods and knew she was the woman for the job. Here is a look into the behind the scenes of the process that went into creating our amazing custom wedding invites!

1) Looking at Examples of Custom Wedding Invites

The first step when working with a custom wedding invite designer like Val, is checking out some past examples of invites. During our first meeting with Val we explored her binders of invites that she has made in the past to see which types of styles we liked the most. Since Val has done so many amazing weddings, there was a lot to go through! We could’ve spent all day just flipping through the invites, each set is so unique and beautiful in its own way. But as we looked through them we told Val what we liked and didn’t like and she made some suggestions to guide us as well.
2) Looking at Custom Wedding Invite Materials

By our next meeting, Cristen had come up with our design plans and mood boards so we all had a much clearer idea of what the entire wedding would look like and how we wanted the stationary to fit into the look at feel. So it was time to start making some decisions on materials, fonts and colors! This meeting was a lot of fun because Val had ordered some special samples for us and we could really start to see what our invites would look like!
3) Deciding on Wedding Invite Details

After that second meeting with Val, she got to work on laying out the invites and sent us some digital samples for us to check out! This was so exciting! Seeing our names on the invite designs and the font options, was a blast to see. We chose from the font options and then the invites were off to print!
4) The Final Product: Our Custom Wedding Invites

Last but not least, it was time to pick up our invites! When we met Val, she showed us how to mail them and finish the assembly and we were off! They were all so beautiful, we couldn’t wait to get them off to our friends and family!
5) Mailing Them

Since our invites were quite detailed, they actually each came in their own little box, we chose to mail each one in a bubble mailer so they would arrive in perfect condition. Did you know that the post office located right behind South Station is open 7 days a week, 6am to midnight? We actually mailed our invites on a Sunday! Can’t wait to show you guys the finished product, styled beautifully in Rome!
6) Roma
And once we got to Rome we had Josh and Brian from Move Mountains shoot some amazing styled detail shots of Val’s breathtaking suite.


If you are planning a wedding be sure to check out our entire wedding planning blog series, where we break down everything from wedding dress shopping to wedding floral design!
Behind the scenes photos are from us and the styled shots of the invites in section 6 are by Move Mountains Co.


